
Changing Roads
The Bexhill West Turntable has been designed to be as simple and as intuitive as possible to use. However, there are a few functions which are, at best, not immediately obvious - so please do have a read of this part of the manual to be sure you know all of the tricks your turntable now has up it's proverbial sleeves.
Normal movement
We assume you have more than one road programmed for this section of the manual. To see some of the things you can do with only one road programmed, see the following pages.
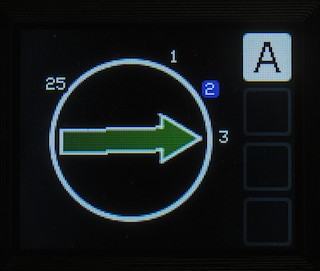
Let's assume we have four roads configured, and that the turntable is currently pointing at road 1.
I press the number 3 on the keypad, which lights up road 3, and adds a "spot" at the HEAD (pointy end) of the turntable to indicate that the head will move to that road:
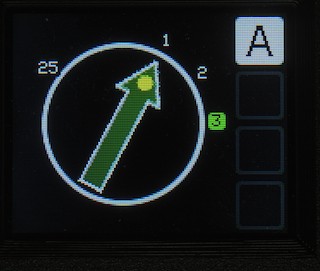
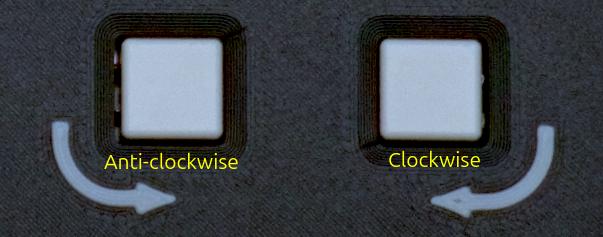
Next, I can press either the Anti-clockwise or Clockwise button to start the turntable off in the appropriate direction.
As I am not completely crazy, I will choose to go clockwise to road 3:
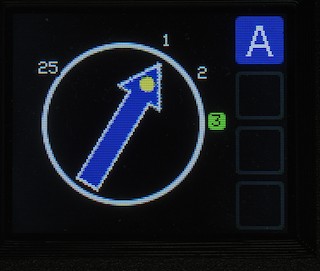
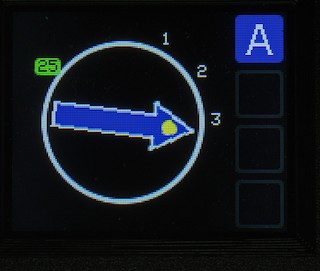
The arrow turns blue to indicate that the turntable is now moving (as does the letter indicator on the right-hand side. If you have multiple turntables here, the colour of the indicator gives you an idea of what state it's in - more on that later in the manual).
The arrow will track around the screen in sync with the turntable, until it arrives at its destination. At this time, the arrow will return to being green (ready), and the indicators all go out.
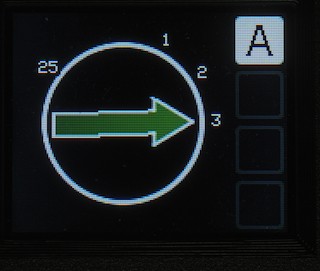
Now let's say I want to send the TAIL of the turntable to road 25.
 |
 |
First, type "25" on the keypad. Notice that when I press "2", road "2" highlights in blue; as long as I type the "5" before it turns green, it will pick road "25". If it does happen to "lock in" to road 2; just type "25" again, with less of a pause between the 2 and the 5!
Next, press the star (![]() ) key to toggle which end of the turntable will be going to the chosen road. The spot will move from the pointy (
) key to toggle which end of the turntable will be going to the chosen road. The spot will move from the pointy (HEAD) end to the blunt (TAIL) end, and back again, each time you press the star key.
Once again, we'll take the sensible option and go clockwise to this position!
As before, when the tail of the turntable arrives at the road (25), the arrow will turn green again, and the indicators will go out, ready for the next movement.
Congratulations!
Now you can spin your locos in every direction!
Polarity Switching
When you configured your roads, you had the option of NORMAL or SWAPped polarity. If you set them all up as normal; if you send the TAIL of the turntable to a road, you will realise that it needs the polarity changing over, otherwise the loco will short out when it tries to leave or join the turntable...
With TAIL movements, the system automatically figures out that the reverse of the programmed polarity is required, and will switch accordingly. Similarly, if you send the HEAD end of the turntable to a road with the opposite polarity to the one it's on now, it will automatically switch over mid-way through the move. You may be able to discern a very faint "click" as the polarity switches, as we handle this with a mechanical relay.
Even though it's a relay, it switches fast enough that DCC sound is unaffected by the switch.
You can switch off the auto-polarity changeover in the mechanism settings, should you wish to.