Firmware Updates - Controller
Inevitably, with any system of this complexity, there will be bugs; ghosts in the machine - but also improvements and additions we can make in the future.
To allow us to distribute bug fixes and so on, your Bexhill West Turntable controller can connect itself to your local WiFi, from where you can access it with a browser in order to update the firmware.
At this time, uploading the firmware is the ONLY thing the controller can do when connected to your WiFi network. We may add the ability to configure it from a web page in future, if there's any demand for that feature.
You will need an Apple or Android smartphone to link your controller to the local WiFi network.
Make sure your battery is well charged, or the unit is plugged in, before updating! If the unit loses power/is switched off during the update, it is possible you will "brick" your controller, and will have to send it back to us for repairs.
Initialise OTA Update
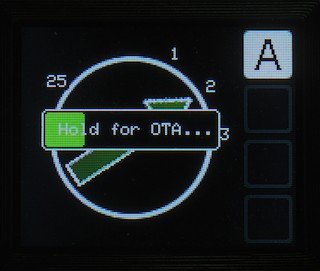
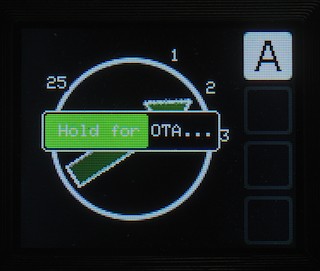
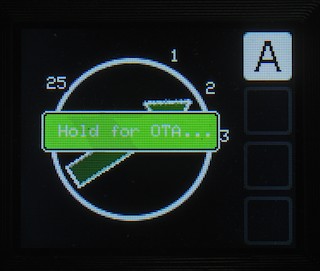
Over-the-air (OTA) updates are the means of wirelessly transferring new firmware to the controller. To access the OTA section, power up the controller and wait for it to at least reach the "Scanning" screen. Then press and hold the STOP and PROG buttons down simultaneously.
A bar will appear on the screen, scrolling left to right. Once it reaches the end, the controller will enter OTA update mode.
 |
 |
 |
First time?
The first time you are connecting your controller to your WiFi network, you need to transmit the network name and password to the controller. This is achieved using a special app on your smartphone, which you will have to download and install first.
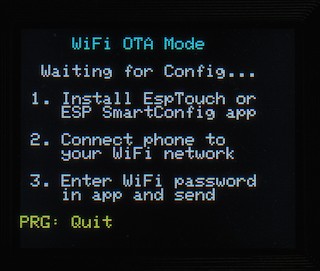
If you have an iPhone, you should download the Espressif ESPTouch app; Android users should go for the ESP SmartConfig app.
Please follow the instructions for your app (I believe that for ESPTouch, you should use the V1 variant, not the V2), I will add some screen shots in due course.
If everything goes to plan, you will shortly see the "connecting" page. This is also the page you'll see after you've connected successfully for the first time - the controller will save the network credentials so you don't need to repeat this step every time (only if you change your WiFi password, or provider, or... you get it).
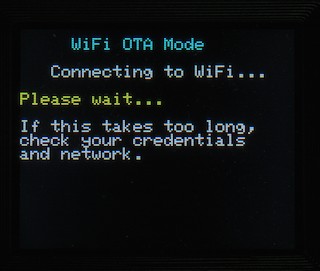
Within a few seconds, you should get an IP address for the controller, along with some options. Sometimes, this step can fail - if so, you will need to repeat the above step, as the controller only saves credentials if it is successful in making a connection.
Connecting to your WiFi network
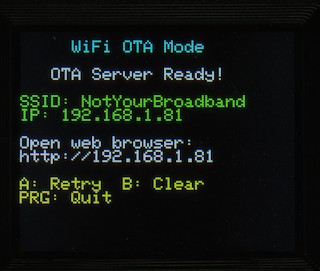
If this is not your first time to the OTA screen, you should only see the "Connecting to WiFi..." screen for a few seconds, followed by the following screen (obviously, the actual IP address will be different for you):
You may also have a screen with a red error message ("Unable to connect to WiFi, check your network and password") - in that instance, usually pressing Retry (A) will work.
You can clear the credentials (e.g. if your network has changed) by pressing "B".
You can also press PROG to quit back to the main system (the controller will re-boot).
Make a note of the URL, you will need to carry out the next steps on your computer.
Uploading the Firmware
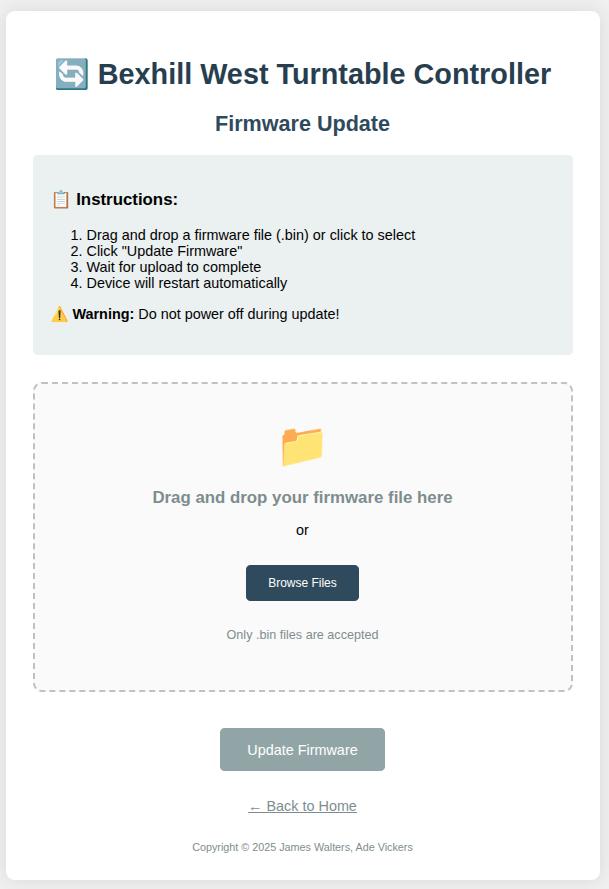
Open your web browser, and navigate to the URL shown on the controller screen (e.g. http//192.168.1.81 in the example above)
You will see this web page
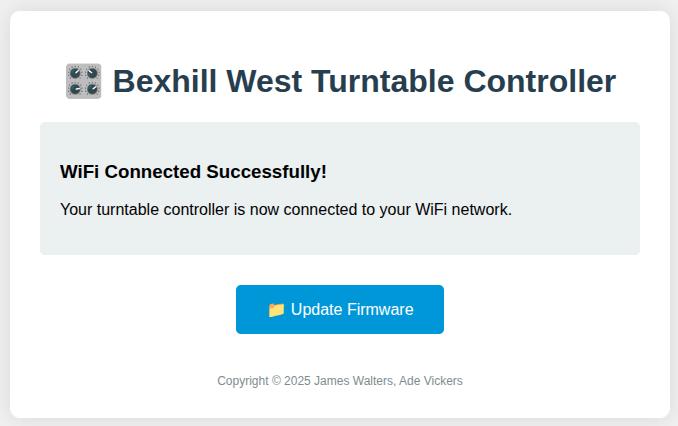
Click on the "Update Firmware" button:
You will need the firmware file you have been sent, or have downloaded from our server (A link to the firmware page will be added here, when it's created - as I write this, there are no firmware updates from the initial release).
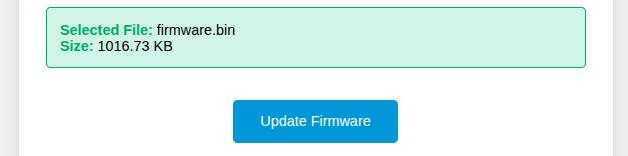
Either click "Browse Files" and use your computer system to locate the file; or you can drag-and-drop it into the dotted box.
The page will do some basic checks on the file, and if all is good, it will enable the Update FIrmware button:
Be sure you have selected the correct file! If you try to upload a bad file, you may "brick" your controller! If this happens, you will have to return it to us for repair.
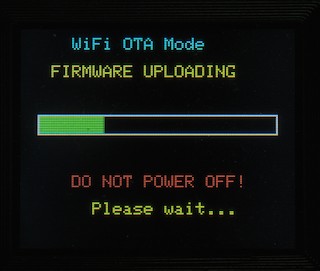
To begin the upload, click the "Update Firmware" button.
On the controller, you will see a progress screen:
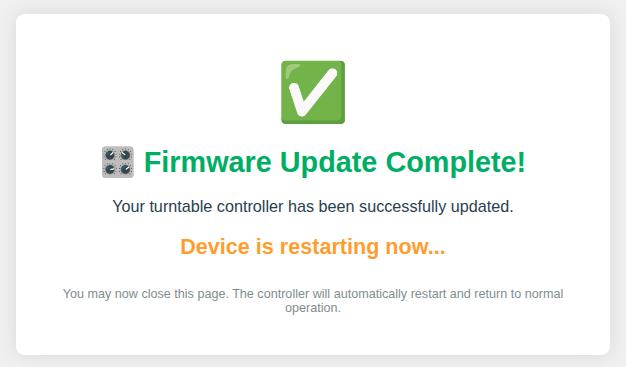
When the update is complete, you will briefly see a confirmation screen on the controller:
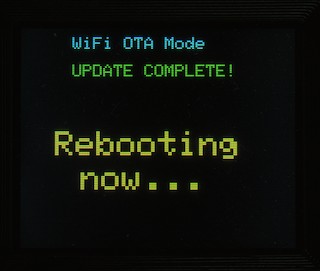
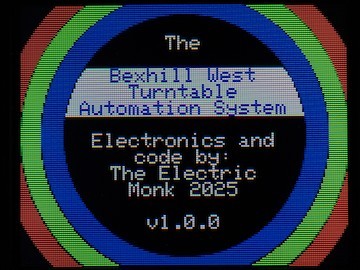
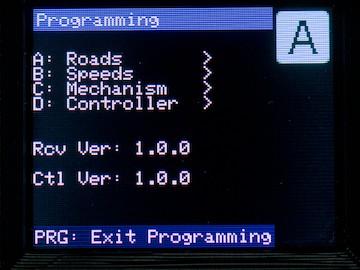
After approximately 3 seconds, the controller will re-boot, running the new firmware version (you can confirm this by checking the version information displayed on the boot screen, or on the main programming menu screen:
  |
Additionally, the web page on your computer will change to the following: