
Firmware Updates - Receiver
In order to simplify the process of uploading firmware to the receiver as much as possible, we have created a program to do the hard work for you.
You will need a data compatible micro-USB cable, and you will need to download the correct version of the program for your operating system.
| Windows | Linux | MacOS | |
|---|---|---|---|
| Firmware Uploader (Program) |
|
||
| Firmware Uploader (Installable) | BWTT-Firmware-Loader-1.0-arm64.dmg | ||
| Virtual COM port drivers | CP210x_Universal_Windows_Driver.zip | Available here | Available here |
If you need the CP210x drivers (and for Windows, you almost certainly will), I would recommend installing them first, as they may require a re-start.
Next, download the firmware file you need for your receiver, if you haven't already done so. Make a note of where it is (usually, your Downloads folder)
The firmware update program is a simple "wizard" style program which will take you through the required steps.
Be careful when choosing the serial port from the drop-down list, to choose the correct one (if you have more than one). If you upload this firmware to another device, anything could happen... It probably just won't work; but it could also "brick" your other device...
To get started, run the firmware uploader program you downloaded in the steps above.
Firmware Uploader
The firmware uploader will start with its splash screen. The current version is v1.0.
 Click Next; the following screen will tell you how to connect the receiver to the computer.
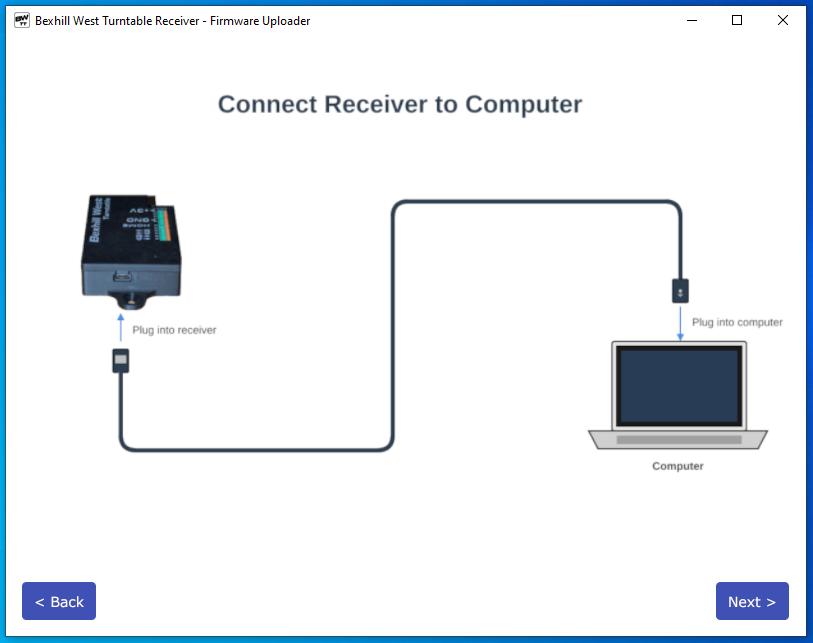
Be careful to insert the micro-USB cable the right way up! The slightly wider side is upwards (so essentially, upside down!) If the receiver is lurking out of plain sight under a baseboard, assuming you've affixed it using the mounting lugs, then the cable will need to be held the "right way up" (USB logo uppermost, generally, for cables with a logo; but either way, the shorter edge should face up).
The cable should click home positively. Once connected to the receiver, connect the other end to your computer.
It does not matter if the receiver is powered up or not - the USB cable will supply power to the receiver hardware if needed. Obviously it will not be able to drive the turntable when powered via USB.
Click Next to move to the next screen.
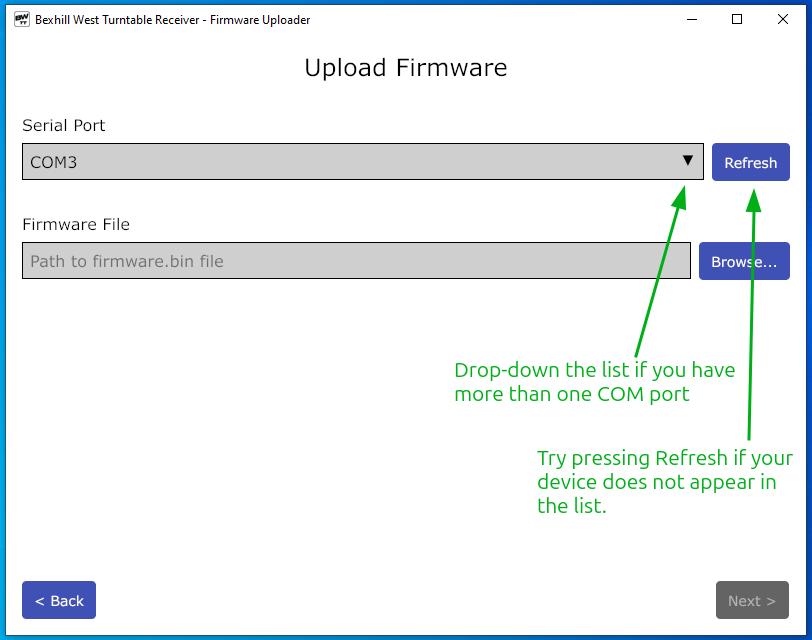
On this screen, you choose the serial port to upload to. On most machines, this is likely to be the only COM port on your system (if no COM ports are detected, check whether the CP210x drivers have installed properly). If you have other Arduino/ESP type devices plugged in, you may have additional COM ports active on your system - be sure to choose the correct one! (and before you ask, no, I don't know how you can tell with certainty which device is on which port!)
After selecting the serial port, now select the firmware file. Be sure to select the BWTT-receiver-vX.X.X.bin file; do not select the controller file! Once you've selected the COM port and firmware file; click the Next button to begin uploading.
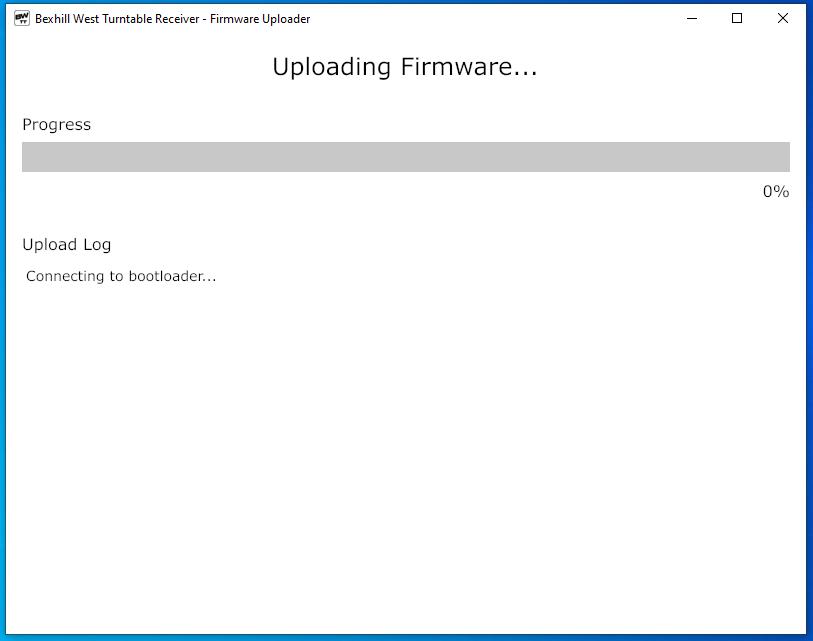
Generally, the firmware will upload without issue. It is possible that the initial handshake will fail - in which case a retry button will appear; click to try again. If the serial port is not detected, or the handshake fails more than once, try removing and re-connecting the cable, then refresh/retry as applicable.
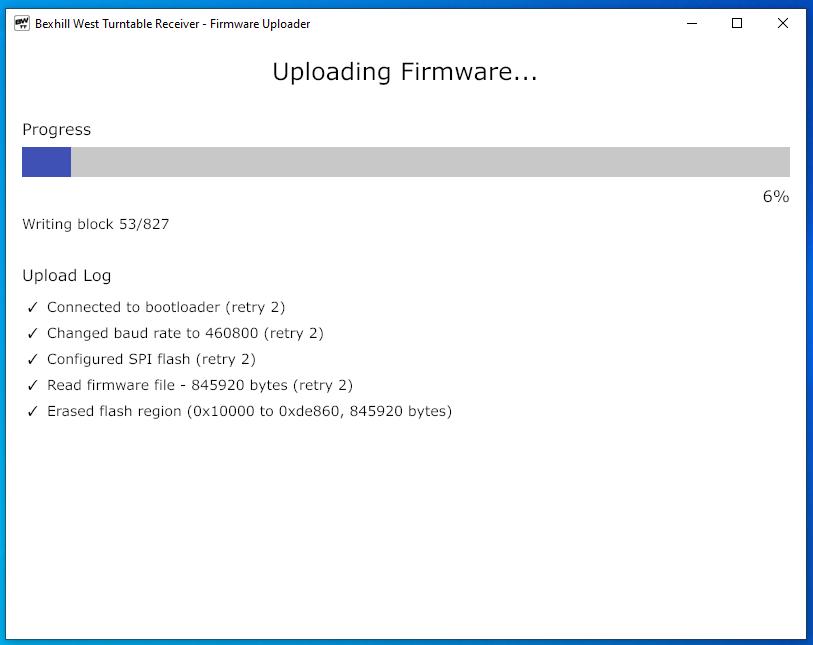
Assuming all goes well, you will see a selection of activities, then a progress bar, which should show healthy progress. It takes approximately 1-2 minutes to burn the new firmware.
Finally, you will see the thank you screen. At this point, you're done! The receiver is updated, and will restart with the new version.

If you have more than one receiver to update, click the "Flash Another" button to move on to the next one.
Unless called out in the release notes, your receiver's configuration (track locations, etc.) will be preserved, so you will not need to re-configure anything - except for any new features you wish to use of course.
No Comments