
Introducing The Bexhill West Turntable Controller
The Bexhill West Turntable Controller is an advanced wireless control system for up to four fully indexed turntables.
Please refer to the image below:
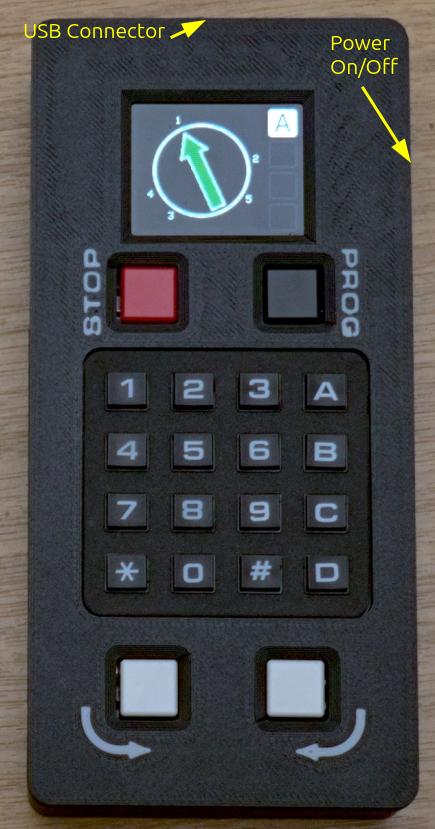
On the very top of the unit is the USB charge port. This takes any USB-C plug. The other end should be connected to a standard USB power outlet - e.g. a wall wart, or computer, or USB dock for example. Ideally, this should be capable of outputting 21W, although lower values will work fine.
On the right-hand side is the power on/off switch.
From the top, on the front of the controller:
- The LCD screen
- A red "emergency stop" button
- A black "programming" button
- The 16-key keypad
- White "anticlockwise" and "clockwise" buttons
The controller can be connected to up-to 4 receivers simultaneously. These are given the letter designations A to D. Only connected (active) receivers are shown on the screen.
Fitting the battery
Before using your controller for the first time, you will need to fit the battery. Please take careful note of the polarity! The positive end of the battery (usually the end with the smaller diameter connection, or a "nub", depending on the battery type) goes towards the top of the controller; the negative to the spring.
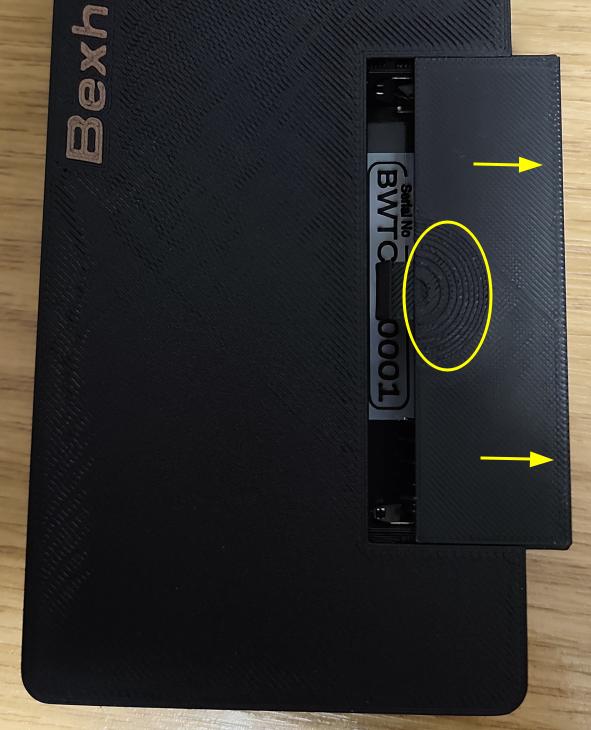
To open the battery cover, press gently on the depression in the cover, and slide to the right. Insert the battery (don't re-fit the cover just yet), and power on the receiver. If it powers up, re-fit the battery cover, you are good to go.
Occasionally, the battery management sub-board can be a bit funny about powering up the first time purely by battery. If this happens, push the battery away from the positive terminal (with the unit still switched on), and then release it to re-connect. This is usually enough to trigger it.
If it still fails to power up: Please turn it off, connect it to a USB power supply, and switch it on. That should definitively power it up, and it should run fine on the battery after that.
Charging
To re-charge the battery, switch the controller off, and plug in a USB-C cable. Connect the other end of the cable to any USB power source - a dedicated adapter is preferred, but you can re-charge from a computer or car USB outlet if that's all you have. Note that a computer USB port may take considerably longer than a USB power adapter to fully recharge the battery.
In typical use, you should get 8 hours out of a full charge. The supplied battery may need a couple of cycles before it gives that time consistently. If you need more than 8 hours in a session, we recommend either purchasing a second battery (any 18650 3.7v Lithium ion cell will do, although be wary of unknown brands offering spectacular capacities...), or you can run the controller with USB power connected, which (if the power source is capable enough) will extend the run time indefinitely.
We recommend letting the battery charge fully as soon as possible after receiving and installing the turntable for the first time - whilst there will be some charge in the battery when it is supplied, it is not a full charge & therefore may go flat at any time.
Next Steps
Now you are ready to pair your receiver(s) and controller(s), which is the next page in this chapter.
No Comments